Canon addresses vlogging demands with the EOS R50 V‚ a new entry-level mirrorless camera‚ alongside the PowerShot V1‚ filling a gap in their RF mount lineup.
What is the Canon EOS R50?
The Canon EOS R50 is a recently released‚ compact‚ and lightweight mirrorless camera designed to be an accessible entry point into Canon’s RF mount system. Announced alongside the PowerShot V1 in March 2025‚ it specifically targets the growing vlogging and content creation market.
This camera represents Canon’s response to a previously unmet need within their product range – a dedicated vlogging camera. While Canon has launched 20 cameras utilizing the RF mount since 2018‚ the R50 is positioned as a more affordable and user-friendly option‚ particularly for beginners. It’s effectively an entry-level camera‚ sharing similarities with the EOS R8 but at a lower price point.
Target Audience: Who is this camera for?
The Canon EOS R50 is primarily aimed at aspiring vloggers and content creators seeking an easy-to-use and affordable entry into the world of mirrorless cameras. It’s perfect for individuals new to photography and videography‚ offering a simplified experience without sacrificing image quality.
Given its compact size and lightweight design‚ the R50 is also well-suited for travel and everyday carry. It appeals to users who want a capable camera that won’t weigh them down. Canon strategically positioned it to fill a gap in the market‚ catering to those who found previous RF mount cameras too expensive or complex. Essentially‚ it’s for anyone wanting to create high-quality video content easily.

Key Features and Specifications
Canon’s recent releases‚ the EOS R50 and EOS R8‚ are entry-level mirrorless cameras differing in price‚ both utilizing the innovative RF mount system.
Sensor and Processor
The Canon EOS R50 boasts a 24.2-megapixel APS-C CMOS sensor‚ delivering a balance between detail capture and efficient performance. This sensor size is notably smaller than full-frame‚ contributing to the camera’s compact design and affordability. Paired with this sensor is the powerful DIGIC X processor‚ the same processor found in Canon’s higher-end models.
This combination enables fast processing speeds‚ excellent image quality‚ and advanced features like Dual Pixel CMOS AF. The DIGIC X processor also plays a crucial role in the camera’s video capabilities‚ supporting 4K recording and enhancing overall responsiveness. The sensor and processor work synergistically to provide a solid foundation for both photography and videography‚ making the R50 a versatile option for content creators.
Image Quality: Photos and Videos
The Canon EOS R50 delivers impressive image quality thanks to its 24.2-megapixel APS-C sensor and DIGIC X processor. Photos exhibit good detail‚ dynamic range‚ and color accuracy‚ particularly in well-lit conditions. Low-light performance is respectable‚ though some noise is noticeable at higher ISO settings.
Video capabilities include oversampled 4K recording at up to 30fps‚ providing sharp and detailed footage. The camera also supports 1080p recording at higher frame rates for slow-motion effects. While not a professional-grade cinema camera‚ the R50’s video quality is more than adequate for vlogging‚ social media content‚ and everyday video recording‚ offering a significant step up from smartphone cameras.
Autofocus System: Dual Pixel CMOS AF

The Canon EOS R50 boasts Canon’s renowned Dual Pixel CMOS AF system‚ ensuring fast‚ accurate‚ and reliable autofocus performance. This system utilizes phase-detection autofocus across nearly the entire sensor area‚ providing excellent subject tracking capabilities. It excels at recognizing and tracking people‚ animals‚ and vehicles‚ making it ideal for dynamic subjects.
The camera features eye-detection AF‚ which locks onto and maintains focus on a subject’s eyes‚ even when they are moving. This is particularly useful for portrait and vlogging applications. The autofocus system performs well in both bright and low-light conditions‚ contributing to consistently sharp images and videos.

Setting Up Your EOS R50
Initial setup involves charging the battery‚ inserting a formatted SD card‚ and configuring essential settings like date‚ time‚ and establishing a Wi-Fi connection.
Charging the Battery
Before first use‚ it’s crucial to fully charge the Canon EOS R50’s battery. Locate the battery compartment‚ typically on the bottom of the camera‚ and insert the supplied battery pack‚ ensuring correct polarity. Connect the provided USB cable to the camera and a USB power source – a wall adapter or computer USB port will work.
A charging indicator light illuminates‚ usually orange while charging and turning green when complete. Charging time varies‚ but a full charge typically takes around 2-3 hours. Canon recommends using the official Canon charger for optimal performance and battery longevity. Avoid using third-party chargers‚ as they may damage the battery or camera. Once fully charged‚ disconnect the cable and enjoy your shooting!
Inserting and Formatting the SD Card
To store your photos and videos‚ you’ll need a compatible SD card. Locate the SD card slot on the Canon EOS R50 – it’s usually found on the side of the camera‚ often behind a small door. Gently insert the SD card into the slot‚ ensuring it clicks into place. Do not force it!
Upon initial use‚ the camera will likely prompt you to format the SD card. Formatting prepares the card for use with the camera and erases all existing data. Select “Format” from the camera’s menu. Choose “Quick Format” for a faster process or “Full Format” for a more thorough erase. Always back up important data before formatting. Using a high-speed SD card is recommended for 4K video recording.
Initial Camera Setup: Date‚ Time‚ and Wi-Fi
After powering on your Canon EOS R50‚ the initial setup process will guide you through essential settings. First‚ set the correct date and time. Accurate date/time stamps are crucial for organizing your photos and videos. Navigate to the settings menu and adjust these accordingly.
Next‚ connect to a Wi-Fi network. This enables features like transferring images to your smartphone using the Canon Camera Connect app and remote camera control. Select your network from the list and enter the password when prompted. Establishing a Wi-Fi connection unlocks convenient sharing and backup options‚ streamlining your workflow.

Shooting Modes and Settings
The EOS R50 offers diverse shooting modes – Auto for simplicity‚ Scene for presets‚ and Manual for full control – alongside 4K and 1080p video options.
Photo Shooting Modes: Auto‚ Scene‚ and Manual
The Canon EOS R50 provides a range of shooting modes to cater to different skill levels and creative intentions. Auto mode simplifies photography‚ letting the camera handle all settings for optimal results in various conditions – perfect for beginners or quick snapshots.
Scene modes offer pre-defined settings tailored to specific scenarios like portraits‚ landscapes‚ sports‚ or night photography‚ allowing users to achieve desired effects without manual adjustments.
For experienced photographers seeking complete control‚ Manual mode unlocks full customization of aperture‚ shutter speed‚ ISO‚ and white balance. This empowers users to fine-tune every aspect of the image‚ fostering creativity and precision. Understanding these modes is crucial for maximizing the R50’s photographic potential.
Video Recording Modes: 4K and 1080p
The Canon EOS R50 excels in video capabilities‚ offering both 4K and 1080p recording options to suit diverse needs. 4K resolution delivers incredibly detailed footage‚ ideal for professional-looking videos or future-proofing content. However‚ it demands more storage space and processing power.
1080p provides a balance between quality and file size‚ suitable for everyday vlogging‚ social media uploads‚ and projects where extreme detail isn’t essential. The R50’s video modes also include various frame rates‚ allowing for slow-motion effects or standard playback.
Choosing the appropriate mode depends on the intended use and available resources‚ ensuring optimal video quality and efficient workflow.
Understanding Exposure: Aperture‚ Shutter Speed‚ and ISO
Mastering exposure is crucial for capturing well-lit photos and videos with the Canon EOS R50. Exposure is controlled by three key settings: aperture‚ shutter speed‚ and ISO. Aperture controls the lens opening‚ affecting depth of field – a wider aperture (lower f-number) creates a shallow depth of field‚ blurring the background.
Shutter speed determines how long the sensor is exposed to light; faster speeds freeze motion‚ while slower speeds allow more light in but can cause blur. ISO measures the sensor’s sensitivity to light; higher ISO values are useful in low light but can introduce noise.
Balancing these three elements is key to achieving the desired exposure.

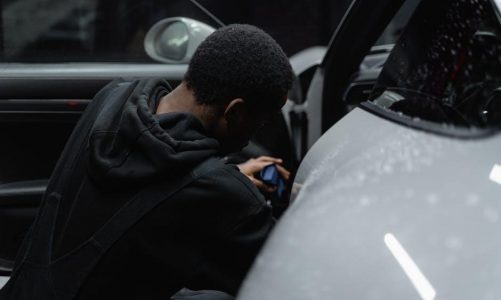
Using the EOS R50 for Vlogging
Canon designed the EOS R50‚ alongside the PowerShot V1‚ specifically to meet the growing needs of video creators and aspiring vloggers today.
Built-in Microphone and Audio Settings
The Canon EOS R50 offers a built-in stereo microphone‚ providing a convenient audio solution for immediate vlogging or recording needs. While suitable for basic recording scenarios‚ the integrated microphone’s performance is naturally limited by its size and placement. Users can adjust audio recording levels manually within the camera’s menu system‚ allowing for some control over input gain.
For improved sound quality‚ especially in challenging environments‚ utilizing external audio solutions is highly recommended. The R50 features a standard 3.5mm microphone input jack‚ enabling connection to external microphones. Understanding and adjusting the audio settings‚ including attenuation levels‚ is crucial for achieving clear and professional-sounding recordings. Experimentation with different settings is encouraged to optimize audio capture for various shooting conditions.
Using External Microphones
The Canon EOS R50 significantly enhances audio quality when paired with external microphones. A standard 3.5mm microphone input allows connection to a wide range of options‚ from compact shotgun mics for directional sound capture to lavalier microphones for interviews. When connecting an external microphone‚ ensure it’s properly powered – some require separate batteries or phantom power (though the R50 doesn’t supply phantom power).
Within the camera’s audio settings‚ you can select the audio input source (internal or external mic) and adjust recording levels. Monitoring audio levels using headphones connected to the R50 is highly recommended to prevent clipping or excessively low recordings. Experiment with microphone placement to minimize unwanted noise and maximize clarity for professional-sounding vlogs and videos.
Flip Screen and Self-Recording
The EOS R50’s fully articulating flip screen is a vlogger’s best friend‚ enabling easy self-monitoring while recording. This feature allows you to see yourself in the frame‚ ensuring proper composition and focus. The screen rotates 180 degrees‚ folding inwards to protect it when the camera is stored.
To initiate self-recording‚ simply flip the screen to face forward and select the appropriate recording mode. Utilize the camera’s autofocus system‚ particularly Dual Pixel CMOS AF‚ to maintain sharp focus on your face even during movement. Experiment with different angles and lighting to achieve the desired look for your vlogs‚ leveraging the screen’s flexibility for creative shots.

Connectivity and Transferring Images
The EOS R50 offers seamless connectivity via Wi-Fi and Bluetooth‚ facilitating easy image transfer using the Canon Camera Connect app to your computer.
Wi-Fi and Bluetooth Connectivity
The Canon EOS R50 boasts integrated Wi-Fi and Bluetooth capabilities‚ streamlining the process of transferring your photos and videos to compatible smartphones‚ tablets‚ and computers; Wi-Fi allows for direct connection to networks‚ enabling quick sharing to social media platforms or cloud storage services. Bluetooth provides a constant‚ low-energy connection‚ ideal for remote camera control via the Canon Camera Connect app and automatic image transfer in the background.
Establishing a Wi-Fi connection involves selecting your network within the camera’s menu and entering the password. Once connected‚ you can utilize the Camera Connect app to browse‚ download‚ and manage your images wirelessly. Bluetooth pairing is equally straightforward‚ allowing for a stable connection even when Wi-Fi isn’t readily available. These connectivity options significantly enhance the workflow for content creators‚ making it easier to share their work with the world.
Canon Camera Connect App
The Canon Camera Connect app serves as a central hub for controlling your EOS R50 remotely and transferring images wirelessly. Available for both iOS and Android devices‚ this application unlocks a range of functionalities‚ including live view monitoring‚ remote shutter release‚ and full manual control over camera settings like aperture‚ shutter speed‚ and ISO.
Beyond remote control‚ the app simplifies image browsing‚ downloading‚ and sharing. You can easily select and transfer photos and videos to your smartphone or tablet for immediate editing and posting on social media. The app also facilitates firmware updates‚ ensuring your camera remains up-to-date with the latest features and improvements. It’s a crucial tool for maximizing the EOS R50’s potential and streamlining your creative process.
Transferring Images to a Computer
Transferring images from your EOS R50 to a computer can be achieved through several methods. The most straightforward involves using the Canon Camera Connect app‚ enabling wireless transfer via Wi-Fi. Alternatively‚ you can physically connect the camera to your computer using a USB cable‚ which often appears as a removable drive.
For larger transfers or faster speeds‚ utilizing an SD card reader is recommended. Simply insert the SD card into the reader‚ connect it to your computer‚ and copy the files. Canon’s Digital Photo Professional (DPP) software‚ available for free download‚ offers advanced image management and editing capabilities alongside transfer options. Choose the method that best suits your workflow and transfer volume.

Advanced Features
The EOS R50 boasts creative filters‚ customizable button functions‚ and Movie Digital IS for stabilization‚ enhancing user control and creative possibilities within the camera.
Creative Filters and Picture Styles
The Canon EOS R50 offers a range of creative filters to instantly alter the mood and appearance of your photos and videos. These filters‚ easily accessible through the camera’s menu‚ allow for quick experimentation with different looks without needing post-processing. Options include Fish-eye‚ Monochrome‚ Color Emphasis‚ and more‚ providing diverse artistic effects.
Beyond filters‚ Picture Styles provide more subtle control over image characteristics. You can choose from Standard‚ Portrait‚ Landscape‚ Neutral‚ Faithful‚ and Monochrome‚ each adjusting color‚ contrast‚ and sharpness to suit specific shooting scenarios. These styles can be further customized to match your personal preferences‚ allowing for a tailored visual output directly from the camera. Experimenting with both filters and Picture Styles unlocks a world of creative expression.
Movie Digital IS: Stabilization Options
The Canon EOS R50 incorporates Movie Digital IS‚ a powerful in-body image stabilization system designed to minimize camera shake during video recording. This feature is crucial for achieving smooth‚ professional-looking footage‚ especially when shooting handheld. The system works by compensating for angular and shift movements‚ resulting in remarkably stable videos.
Several stabilization modes are available‚ including Standard IS‚ which provides all-around shake correction‚ and Powered IS‚ which enhances stabilization during panning and walking shots. Combining Movie Digital IS with the lens’s own image stabilization (if equipped) further improves stability. Understanding these options allows you to optimize stabilization based on your shooting style and environment‚ ensuring clear and steady videos.
Customizing Button Functions
The Canon EOS R50 offers extensive customization options‚ allowing users to tailor the camera’s controls to their individual shooting preferences. A key aspect of this is the ability to assign custom functions to various buttons and dials. This personalization streamlines your workflow‚ providing quick access to frequently used settings.
Through the camera’s menu system‚ you can re-define the operation of buttons like the AF-ON button‚ the Quick Control dial‚ and even the movie recording button. This allows you to instantly adjust settings such as ISO‚ aperture‚ or white balance without navigating through menus. Experimenting with these customizations can significantly enhance your shooting efficiency and overall user experience.

Troubleshooting Common Issues
Addressing potential problems‚ the EOS R50 may encounter issues like failing to power on‚ focusing difficulties‚ or subpar image quality – solutions are readily available.
Camera Not Turning On
If your Canon EOS R50 fails to power on‚ begin with the simplest checks. Ensure the battery is correctly inserted and fully charged; a depleted battery is a common culprit. Try a different‚ known-good battery if available to rule out a battery issue.
Next‚ verify the battery compartment contacts are clean and free of any obstructions. Sometimes‚ a simple cleaning can resolve connection problems. Also‚ confirm the power switch is fully engaged in the ‘ON’ position. If the camera still doesn’t respond‚ inspect the DC coupler (if used) and the AC adapter for proper connection and functionality.
In rare cases‚ a firmware issue might cause this. While less common‚ consider checking Canon’s support website for any relevant firmware updates or troubleshooting guides specific to this power-on issue.
Focusing Problems
Experiencing focusing issues with your Canon EOS R50? First‚ ensure you’re in the correct autofocus mode – One-Shot for static subjects and Servo for moving ones. Verify the focus point selection method is appropriate for your scene; automatic selection can sometimes misinterpret the subject.
Check the lens for cleanliness; smudges or dirt can hinder autofocus performance. Confirm sufficient lighting conditions‚ as low light can challenge the autofocus system. If using Eye Detection AF‚ ensure the subject’s eye is clearly visible.
Experiment with different focus areas and modes within the camera’s menu. If problems persist‚ try manually focusing to determine if the issue lies with the autofocus system or the lens itself.
Image Quality Issues
If your Canon EOS R50 images appear blurry or lack detail‚ begin by verifying your shooting settings. Ensure you’re using an appropriate ISO level; higher ISOs introduce noise‚ reducing image clarity. Confirm your aperture is set for sufficient depth of field‚ especially for landscapes.
Check your shutter speed – slower speeds can cause motion blur. Review the image stabilization settings‚ activating it when shooting handheld. Examine the image file format; RAW captures more data than JPEG‚ allowing for greater editing flexibility.
Inspect the lens for any damage or dirt. Finally‚ ensure proper exposure compensation is applied to avoid underexposed or overexposed images.