
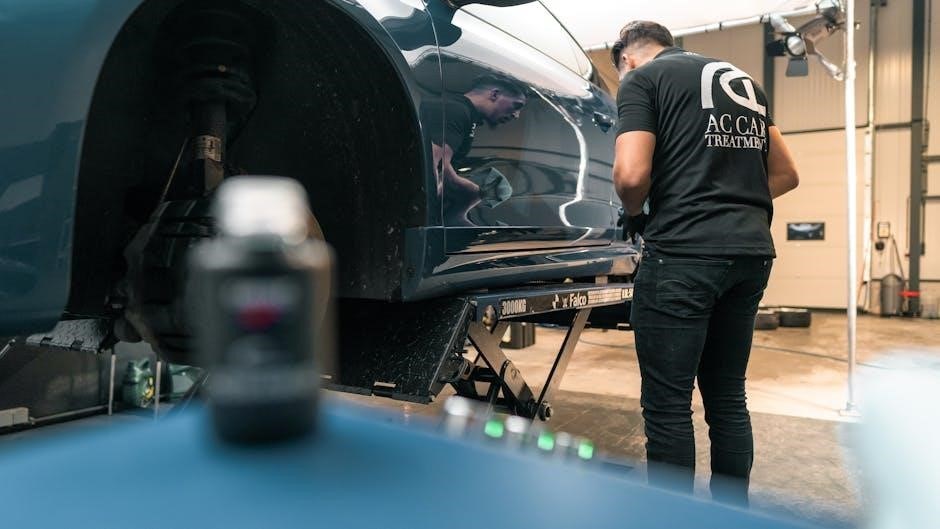
Genie Garage Door Opener Troubleshooting Guide — Overview
This comprehensive guide assists in swiftly diagnosing and resolving common Genie garage door opener issues‚ ensuring reliable and smooth operation for various models.
Genie garage door openers‚ while generally reliable‚ can experience several recurring problems; These frequently include issues with the remote control – batteries failing or needing reprogramming – and problems with the safety sensors‚ often due to misalignment or obstructions. Power supply interruptions‚ like tripped GFCI outlets or wiring faults‚ are also common culprits. Furthermore‚ incorrect force adjustments or limit switch settings can cause the door to reverse unexpectedly or fail to fully open/close. Diagnostic lights on Excelerator series models offer clues‚ but understanding these codes is key.
Scope of this Troubleshooting Guide
This guide provides a systematic approach to resolving issues with a wide range of Genie garage door opener models‚ including ChainLift (600/800 series – 1022‚ 2022)‚ ReliaG (600/800 series – 1024‚ 2024)‚ and BeltLift 600 (1042) series. It covers basic checks like power source verification and remote functionality‚ progressing to more complex areas like safety sensor diagnostics and force/limit adjustments. We’ll also address the Excelerator series’ diagnostic lights and procedures for manual operation‚ vacation lock usage‚ and advanced component inspection.

Power Supply & Electrical Issues
Addressing power problems is the first step; check the power source‚ GFCI outlets‚ and wiring connections to ensure proper electrical functionality.
Checking the Power Source
Begin by verifying the garage door opener is receiving power. Ensure the unit is plugged securely into a functioning electrical outlet; Test the outlet with another device to confirm it’s providing electricity. If using an extension cord‚ confirm it’s heavy-duty and in good condition. A tripped circuit breaker is a common culprit; check your electrical panel and reset any tripped breakers. Finally‚ confirm the power switch on the garage door opener itself hasn’t been accidentally switched off. A lack of power is often the simplest fix!
GFCI Outlet Reset Procedure
If your Genie opener is plugged into a GFCI (Ground Fault Circuit Interrupter) outlet‚ a tripped GFCI could be the issue. Locate the GFCI outlet‚ typically found in garages or bathrooms. Press the “Reset” button on the outlet face. If it doesn’t reset‚ check for any other devices plugged into the same circuit that might be causing the fault. If the GFCI continues to trip‚ there may be a more serious electrical problem requiring a qualified electrician. Always prioritize safety when dealing with electrical components.
Examining the Wiring Connections
Carefully inspect all wiring connections to the Genie opener‚ ensuring they are secure and free from corrosion. Begin by disconnecting power at the breaker. Check the wiring at the powerhead‚ the GFCI outlet‚ and any intermediate connections. Look for loose wires‚ frayed insulation‚ or signs of damage. Tighten any loose connections and replace damaged wiring as needed. If you are uncomfortable working with electrical wiring‚ consult a qualified electrician to avoid potential hazards and ensure a safe‚ reliable connection.
Remote Control Problems
Addressing remote issues involves checking batteries‚ reprogramming the device‚ and identifying potential signal interference to restore convenient garage door control functionality.
Remote Battery Replacement
Begin troubleshooting a non-responsive remote by replacing the batteries. Use fresh batteries of the correct type‚ typically a CR2032. Carefully open the remote casing‚ noting the battery orientation before removal. Insert the new battery‚ ensuring proper polarity alignment – positive (+) and negative (-) sides must match the markings. Securely close the remote casing. After battery replacement‚ test the remote’s functionality by pressing the open/close buttons. If the remote still fails to operate‚ proceed to remote reprogramming steps‚ as a new battery doesn’t always resolve the issue.
Remote Reprogramming Steps
To reprogram your Genie remote‚ locate the “Learn” button on the garage door opener motor unit – it’s usually yellow or orange. Press and release the “Learn” button. Within 30 seconds‚ press and hold the desired button on your remote control until the garage door opener light flashes. This indicates successful programming. Repeat this process for each additional remote you wish to program. If programming fails‚ ensure no other remotes are simultaneously being programmed. Consult your owner’s manual for model-specific instructions‚ as procedures can vary.
Remote Signal Interference
Remote signal interference can hinder your Genie opener’s functionality. Common culprits include other radio frequency devices‚ LED lighting‚ and even certain types of insulation. Try relocating the antenna wire on the motor unit‚ extending it fully and repositioning it away from potential sources of interference. Ensure the antenna isn’t touching metal. Temporarily disconnect other wireless devices to isolate the issue. If problems persist‚ consider a Genie remote with rolling code technology for enhanced security and reduced susceptibility to interference. Check for obstructions between the remote and the opener.

Safety Sensor Troubleshooting
Properly aligned and clean safety sensors are crucial for safe operation; misaligned or obstructed sensors prevent the door from closing‚ ensuring no one is harmed.
Sensor Alignment Verification
Ensuring your Genie garage door opener’s safety sensors are correctly aligned is paramount for safe and reliable operation. These sensors‚ located near the garage door tracks‚ create an invisible beam. If the alignment is off‚ the door won’t close. Begin by visually inspecting the sensors to confirm they are facing each other.
Next‚ test the alignment by attempting to close the door; if it reverses‚ realignment is needed. Gently adjust the sensor brackets until the indicator lights on both sensors illuminate steadily. A solid light indicates proper alignment‚ while blinking suggests misalignment. Repeat the test until both lights remain consistently on.
Sensor Lens Cleaning
Dust‚ dirt‚ or cobwebs accumulating on the safety sensor lenses can obstruct the infrared beam‚ causing the garage door to malfunction. Regularly cleaning these lenses is a simple yet crucial maintenance step. Use a soft‚ dry cloth to gently wipe each lens. Avoid using any liquids‚ cleaners‚ or abrasive materials‚ as these can damage the sensitive components.
After cleaning‚ retest the door’s operation. If the issue persists‚ repeat the cleaning process‚ ensuring no residue remains. Clean lenses guarantee the sensors accurately detect obstructions‚ enhancing safety and preventing unnecessary reversals.
Sensor Wire Inspection
Carefully inspect the wiring connecting the safety sensors to the garage door opener unit. Look for any signs of damage‚ such as cuts‚ frays‚ or loose connections. Damaged wires can disrupt the signal between the sensors and the opener‚ leading to operational problems. Ensure all connections are secure and properly fastened.
If you find damaged wiring‚ replace it immediately. A faulty wire can compromise the safety system. Tighten any loose connections and verify the wires aren’t pinched or strained. Proper wiring ensures reliable sensor functionality and safe garage door operation.
Force Adjustment & Limit Switch Settings
Adjusting force settings and limit switches ensures smooth door travel and prevents reversal issues; consult your owner’s manual for precise calibration instructions.
Adjusting Upward Force
The upward force setting dictates the power applied to lift the garage door. If the door struggles to open‚ or reverses mid-travel‚ increasing this force might be necessary. However‚ excessive force can be dangerous‚ potentially causing damage to the door or opener. Carefully consult your Genie owner’s manual for specific adjustment procedures‚ as they vary by model. Typically‚ adjustments involve turning dials or using electronic controls to incrementally increase the upward force until the door opens smoothly and fully. Always test the adjustment after each increment‚ and prioritize safety by avoiding settings that apply unnecessary power.
Adjusting Downward Force
Downward force controls the power used to close the garage door. If the door reverses upon reaching the floor‚ the downward force may be insufficient. Conversely‚ excessive downward force can create a safety hazard or damage the door. Refer to your Genie owner’s manual for precise adjustment instructions specific to your model. Adjustments usually involve dials or electronic settings‚ increasing the force incrementally. After each adjustment‚ thoroughly test the door’s closing operation. Prioritize safety; avoid settings that cause the door to slam shut or exert undue pressure on the floor.
Limit Switch Calibration
Limit switches define the fully open and fully closed positions of your garage door. Incorrect calibration can cause the door to travel too far‚ reversing unnecessarily‚ or not closing completely. Calibration typically involves adjusting screws on the limit switch housing‚ or utilizing electronic programming features on newer models. Consult your Genie owner’s manual for specific procedures. Carefully observe the door’s movement during adjustment‚ ensuring it stops precisely at the desired limits. Proper limit switch calibration is crucial for safe and efficient operation‚ preventing strain on the opener.

Specific Genie Model Troubleshooting
This section details troubleshooting steps tailored to popular Genie models‚ including ChainLift‚ ReliaG‚ BeltLift‚ and Excelerator series‚ for focused solutions.
ChainLift 600/800 Series (1022‚ 2022)
For ChainLift 600 (1022) and 800 (2022) series openers‚ begin by verifying power supply and remote functionality. Check the safety sensors for alignment and cleanliness‚ as these frequently cause operational issues. Inspect the chain for proper tension and lubrication; a loose or dry chain can hinder performance. Force adjustments may be needed if the door reverses unexpectedly. If problems persist‚ consult the owner’s manual for specific reset procedures or diagnostic steps. Remember to disconnect power before any internal inspection or adjustments to ensure safety.
ReliaG 600/800 Series (1024‚ 2024)
Troubleshooting the ReliaG 600 (1024) and 800 (2024) series often starts with the safety sensors – ensure they are aligned and free of obstructions. Verify remote control batteries and reprogram if necessary. Check the power source‚ including the GFCI outlet. Inspect the rail for any damage or debris that could impede movement. Adjusting the force settings can resolve issues with the door reversing. If these steps don’t work‚ consult the owner’s manual for model-specific instructions and potential reset procedures. Always prioritize safety by disconnecting power first.
BeltLift 600 Series (1042)
The BeltLift 600 (1042) model requires careful troubleshooting‚ beginning with the safety sensors; alignment and cleanliness are crucial. Confirm remote battery functionality and attempt reprogramming. Inspect the belt itself for wear or damage‚ as this is a key component. Check the power supply and reset the GFCI outlet if needed. Force adjustments may be necessary if the door reverses unexpectedly. Refer to the owner’s manual for specific calibration instructions. Disconnect power before any internal inspection or adjustments to ensure safety during the repair process.
Excelerator Series Diagnostic Lights
Excelerator openers (H8000‚ ISD990) utilize blinking status lights to pinpoint issues‚ offering a quick diagnostic method for common problems and malfunctions.
Understanding Blink Codes (H8000‚ ISD990)
Genie Excelerator series openers‚ like the H8000‚ H8000-07‚ H8000D‚ ISD990‚ ISD995‚ and ISD1000‚ communicate issues through specific blink codes. These patterns from the powerhead’s status light offer valuable diagnostic information. A slow blink often indicates a safety sensor problem‚ while rapid blinking might signal a limit switch issue. Refer to your owner’s manual for a complete decoding of these blink patterns. Understanding these codes allows for targeted troubleshooting‚ saving time and potentially avoiding unnecessary service calls. Properly interpreting the blink code is the first step towards a quick resolution.
Interpreting Status Light Patterns
The status light on Genie Excelerator series openers (including PRO99‚ PRO99-21C‚ and PRO99FN models) provides crucial diagnostic information beyond simple blink codes. Solid lights often indicate normal operation‚ while alternating patterns suggest specific malfunctions. For example‚ a consistently lit light might mean the door is locked‚ while a flashing sequence could point to motor issues. Always consult your owner’s manual for a detailed breakdown of each pattern. Careful observation of the light’s behavior is key to pinpointing the source of the problem and implementing the correct fix.
Excelerator Series Reset Procedure
Resetting a Genie Excelerator opener (like models H8000 or ISD990) can often resolve minor glitches. Begin by disconnecting the power supply for at least 30 seconds. This clears the opener’s memory. Reconnect the power‚ and then press and hold the “Learn” button (usually orange or red) on the motor unit until the status light begins to flash. This initiates the programming mode. Follow the manual’s instructions to reprogram your remotes. A successful reset restores factory settings and can resolve communication errors.

Manual Operation & Disconnection
Learn how to safely disengage your Genie opener and operate the door manually during power outages‚ or for maintenance purposes‚ ensuring continued access.
Releasing the Garage Door
To manually operate your garage door during a power outage or for maintenance‚ you must first disconnect the opener. Locate the emergency release cord‚ typically hanging from the central rail. Gently pull the cord downwards; this will disengage the trolley from the door. Be cautious‚ as the door may be heavy and could fall quickly. Use caution and support the door if necessary. Once released‚ you can operate the door manually. Remember to re-engage the opener by pulling the cord back up until it clicks into place before restoring power‚ ensuring proper operation.
Manual Operation During Power Outage
During a power outage‚ your Genie garage door can still be operated manually after disengaging the opener. With the trolley disconnected (using the emergency release cord)‚ lift or lower the door as you normally would. Remember the door will be heavier without the opener’s assistance‚ so apply steady‚ controlled force. Be mindful of potential obstructions. Once power is restored‚ remember to re-engage the opener by pulling the release cord back up until it clicks securely. This ensures the automatic functions resume correctly.
Reconnecting the Opener
After manual operation or disconnection‚ re-engaging your Genie opener is crucial for restoring automatic functionality. Pull the emergency release cord firmly towards the opener until you hear a distinct click‚ signifying the trolley is reconnected. Gently test the door’s operation using the wall button or remote to confirm proper engagement. If the door doesn’t respond‚ double-check the connection and ensure no obstructions prevent movement. A successful reconnection allows the safety sensors and limit switches to function correctly‚ ensuring safe operation.

Vacation Lock Feature
The Vacation Lock disables remote access‚ enhancing security during extended absences; Activate it using the opener’s control panel for peace of mind while away.
Activating Vacation Lock
To activate the Vacation Lock feature on your Genie garage door opener‚ locate the dedicated button on the control panel. Typically‚ this button is clearly labeled “Vacation Lock” or features a lock icon. Press and hold this button for a specified duration – usually around three to five seconds – until an indicator light illuminates‚ confirming activation.
Once engaged‚ the Vacation Lock disables all remote control functions‚ preventing unauthorized access to your garage. The door can still be operated manually from the inside using the release cord. This feature is ideal when you’re away for extended periods‚ providing an extra layer of security against potential intrusions.
Deactivating Vacation Lock
To deactivate the Vacation Lock‚ simply press and hold the “Vacation Lock” button on the Genie garage door opener’s control panel again. Similar to activation‚ hold the button for approximately three to five seconds. Watch for the indicator light to turn off‚ signifying that the Vacation Lock has been successfully disabled.
Upon deactivation‚ your garage door opener will revert to its normal operating mode‚ allowing you to use remote controls and any programmed access codes. Regularly check the Vacation Lock status before attempting remote operation to avoid unexpected issues and ensure convenient access to your garage.
Advanced Troubleshooting
For persistent issues‚ inspect the logic board and motor for damage or malfunctions; these components often require professional diagnosis and potential replacement.
Checking the Logic Board
The logic board is the “brain” of your Genie opener‚ controlling all functions. Visually inspect it for burnt components‚ swollen capacitors‚ or any signs of physical damage. Carefully check all wiring connections to the board‚ ensuring they are secure and free from corrosion. A multimeter can test for voltage at designated test points‚ verifying power delivery. If you suspect a faulty logic board‚ do not attempt repairs yourself; this is best left to a qualified technician. Replacing the logic board often requires reprogramming‚ specific to your model‚ and can restore functionality if it’s the root cause of the problem.
Motor Inspection
A failing motor can manifest as unusual noises‚ sluggish operation‚ or complete failure. First‚ disconnect power! Inspect the motor for physical damage‚ like cracks or dents. Listen for grinding or squealing sounds during brief‚ controlled tests (with power reconnected carefully). Check the motor’s ventilation openings for obstructions‚ as overheating can cause failure. Examine the capacitor connected to the motor; a bulging or leaking capacitor indicates a problem. Motor replacement is often necessary if issues persist‚ and it’s recommended to consult a professional for this task due to electrical hazards.