Meat slicing at home offers control over quality and thickness, moving beyond pre-packaged options․ This guide explores the benefits and techniques for delicious results!
Why Slice Your Own Meat?
Many home cooks are discovering the advantages of slicing meats themselves, rather than relying on pre-sliced options from the deli counter․ The primary reason is control – you dictate the thickness, ensuring perfect slices for sandwiches, charcuterie boards, or jerky․ This level of customization is simply unavailable with store-bought cuts․
Furthermore, slicing your own meat often translates to significant cost savings, especially if you frequently purchase deli meats․ You can buy larger, less expensive roasts and portion them out as needed․ Beyond economics, it’s about freshness and quality; you know exactly what you’re getting, avoiding unwanted additives or preservatives․
Benefits of Home Meat Slicing
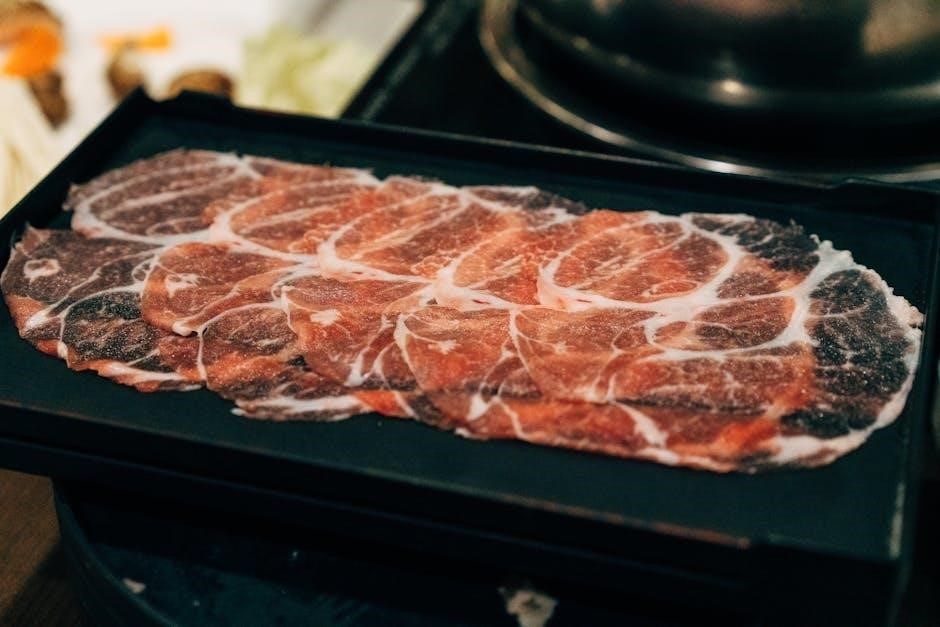
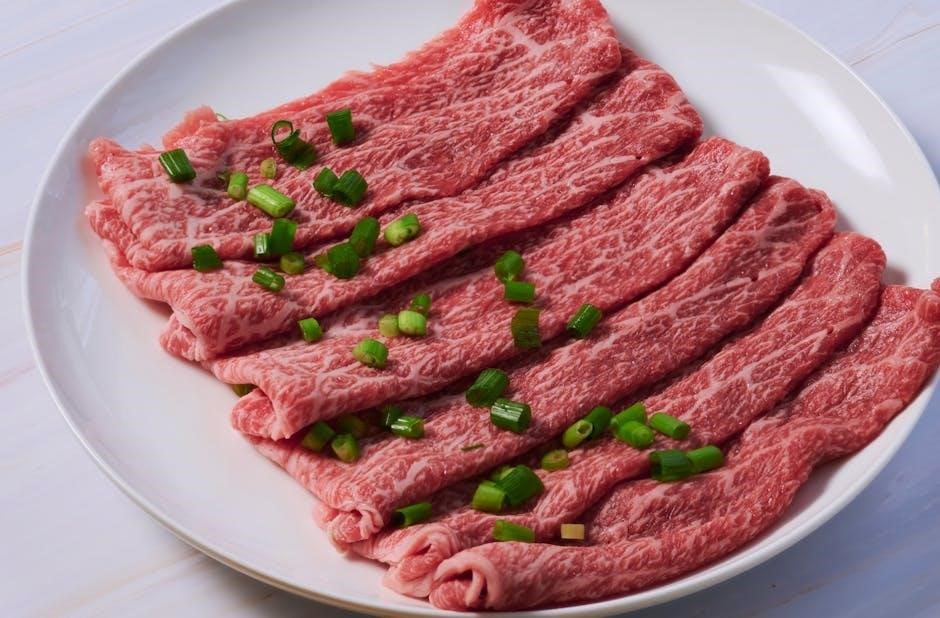
The advantages extend beyond just cost and control․ Home meat slicing unlocks a world of culinary possibilities, allowing you to create restaurant-quality meals with ease․ Consistent, uniform slices enhance presentation and improve the eating experience, particularly for delicate items like roast beef or turkey․
You also gain the flexibility to slice a wider variety of meats and cheeses, including those not typically available pre-sliced․ A good slicer isn’t limited to just meats; it can handle vegetables and even sushi rolls! Ultimately, it’s about elevating your cooking and enjoying fresher, more flavorful food․

Types of Meat Slicers
Meat slicers range from manual, hand-powered models to convenient electric versions․ Commercial slicers exist, but home cooks typically choose between manual and electric options․
Manual Meat Slicers
Manual meat slicers are a cost-effective entry point for home slicing, ideal for infrequent use and smaller volumes․ These rely on hand-cranking to rotate the blade, offering direct control over the slicing process․ They are generally more affordable and require less storage space than electric models․
However, achieving consistent thickness can be more challenging with a manual slicer, demanding more physical effort․ They are suitable for those comfortable with a hands-on approach and don’t require large-scale slicing regularly․ A smooth blade is often found on these, being low maintenance and beginner-friendly․
Electric Meat Slicers
Electric meat slicers provide convenience and consistency, making them suitable for frequent use and larger quantities․ Powered by a motor – often in the 200W range for home models – they offer effortless slicing with adjustable thickness settings․ This allows for versatility, from deli-thin cuts to thicker portions for jerky․
Investing around $200 can secure a mid-range model balancing performance, power, and safety․ Larger blades can handle diverse foods like cheese, expanding their utility․ Smooth blades are common, offering low maintenance and ease of use for beginners․
Commercial Meat Slicers (Brief Mention ‒ for context)
Commercial meat slicers represent a significant investment, designed for high-volume, continuous operation in professional settings like delis and butcher shops․ These robust machines feature powerful motors, large blades, and durable construction to withstand constant use․ While considerably more expensive than home models, they prioritize speed, precision, and sanitation․
They are built for efficiency, often incorporating features like automatic blade sharpening and precise thickness control․ Though not practical for home kitchens, understanding their capabilities highlights the spectrum of meat slicing technology available․

Key Features to Consider
Essential features include a stainless steel blade, adjustable thickness, sufficient motor power (around 200W), and robust safety mechanisms for secure and precise slicing․
Blade Material (Stainless Steel)
Stainless steel blades are the industry standard for meat slicers, and for very good reason․ They offer an exceptional balance of sharpness, durability, and resistance to corrosion – crucial when working with raw meats and frequent cleaning․ A high-quality stainless steel blade will maintain its edge longer, reducing the need for frequent sharpening․
Look for blades specifically labeled as “high-carbon stainless steel” as these tend to hold an edge even better․ Smooth blades are generally easier to maintain and are ideal for beginners, providing clean cuts for meats, cheeses, and even vegetables․ Prioritizing stainless steel ensures both food safety and long-term performance․
Blade Size and Type (Smooth vs․ Serrated)
Blade size significantly impacts versatility; larger blades handle bigger cuts and a wider variety of foods, including cheeses․ However, a mid-size blade is often sufficient for home use, avoiding excessive counter space occupation․ Regarding blade type, smooth blades are favored for their clean, precise cuts and low maintenance․
These fine-edged blades excel at slicing deli meats, cheeses, and even sushi rolls․ Serrated blades, while offering grip for tougher items, can tear softer foods․ For most home slicing needs, a smooth blade provides the best balance of performance and ease of use, making it ideal for beginners․
Motor Power (200W Range for Home Use)
Motor power is a crucial factor in electric meat slicers, directly influencing performance and durability․ For typical home use, a motor in the 200-watt range generally provides sufficient power to slice a variety of meats without being overly bulky or consuming excessive energy․
Higher wattage motors are beneficial for frequent, high-volume slicing or tackling tougher cuts, but aren’t necessary for occasional use․ A lighter-weight slicer with around 200W strikes a good balance, offering adequate power without becoming a cumbersome appliance you rarely utilize․ Consider your slicing frequency when assessing motor power needs․
Thickness Adjustment Dial
A reliable thickness adjustment dial is paramount for versatility when slicing meat․ This feature allows you to customize slice thickness, ranging from paper-thin deli-style cuts to substantial portions ideal for jerky or sandwiches․ Look for a dial that offers smooth, precise adjustments, ensuring consistent results every time․
Easy-to-read markings are also beneficial, enabling quick selection of your desired thickness․ The ability to effortlessly switch between fine and thicker slices expands the slicer’s functionality, making it suitable for diverse culinary applications and preferences․
Safety Features
Prioritizing safety is crucial when operating a meat slicer, given the presence of sharp blades․ Essential safety features include a blade guard that prevents accidental contact, and a locking mechanism to secure the blade when not in use or during cleaning․ A non-slip base is also vital, ensuring stability during operation․
Look for models with a hand guard to protect fingers while slicing․ Emergency stop buttons provide immediate power shut-off in critical situations․ Always read and understand the manufacturer’s safety instructions before use, and practice careful handling․
Preparing Meat for Slicing
Optimal slicing requires properly prepared meat; chilling or partially freezing firms it up․ Trimming excess fat and bone ensures clean, even slices every time․
Chilling the Meat
Chilling meat before slicing is absolutely crucial for achieving those beautiful, uniform slices you desire․ The colder the meat, the firmer it becomes, significantly reducing the risk of tearing or shredding during the slicing process; Ideally, you want to chill the meat for at least 30-60 minutes in the refrigerator prior to slicing․
However, don’t freeze it solid! A slightly firm, but not completely frozen, texture is the sweet spot․ This allows the blade to glide through the meat with ease, creating those professional-looking deli-style cuts․ Remember, warm meat simply won’t cooperate, resulting in ragged and uneven slices․
Partial Freezing Techniques
For exceptionally clean slices, consider partially freezing the meat․ This goes beyond simple chilling and elevates your slicing game․ Place the meat in the freezer for approximately 1-2 hours, aiming for a firm exterior while the center remains slightly pliable․ This technique is particularly effective for larger roasts or tougher cuts of meat․
The partially frozen state provides optimal resistance to the blade, preventing smearing and ensuring precise, even slices․ Be cautious not to freeze the meat completely, as this can make it brittle and difficult to slice․ A slightly icy surface is ideal for achieving professional results․
Trimming Excess Fat and Bone
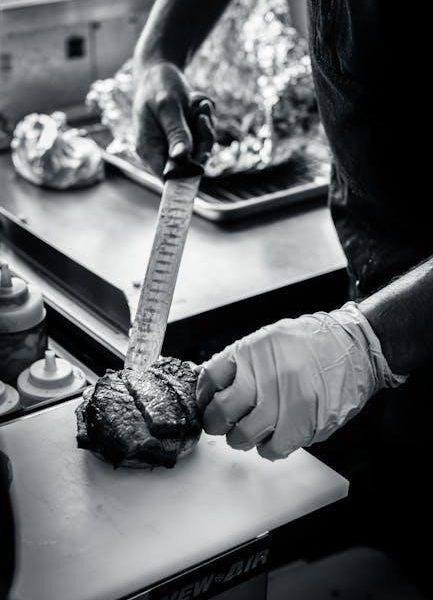
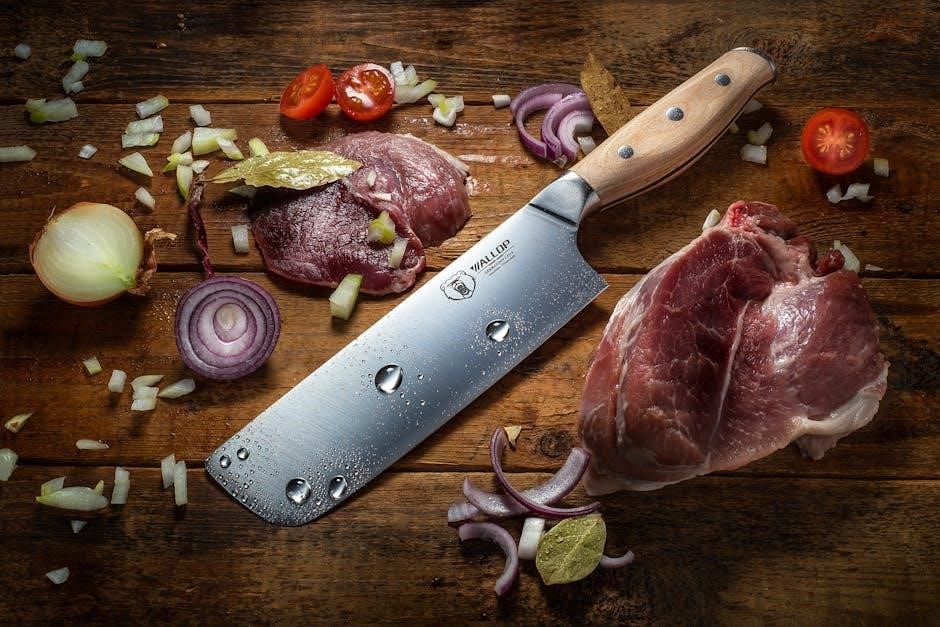
Before slicing, proper preparation is key․ Carefully trim any large pieces of excess fat or bone from the meat․ This ensures cleaner slices and prevents the blade from encountering obstructions․ While a little fat contributes to flavor, too much can hinder the slicing process and create uneven results․
Inspect the meat thoroughly and remove any gristle or silver skin․ A sharp boning knife is ideal for this task․ Remember, a clean surface allows for greater control and precision during slicing, ultimately improving the final presentation and texture of your sliced meat․
Slicing Techniques
Mastering slicing involves consistent thickness and understanding grain direction․ Adjust the dial for desired cuts, from deli-thin to jerky-ready, for optimal texture․
Achieving Consistent Thickness
Consistent slices are the hallmark of a skilled home meat slicer․ The key lies in utilizing the slicer’s thickness adjustment dial effectively․ Begin by selecting a setting and making a test slice to evaluate the result․
Fine-tune the dial incrementally – even small adjustments can significantly impact slice thickness․ Chilling or partially freezing the meat beforehand dramatically improves consistency, preventing tearing and ensuring clean cuts․ Practice makes perfect; don’t be discouraged if initial attempts aren’t flawless․
Remember to maintain even pressure on the meat as it passes through the blade, and avoid rushing the process․ A steady hand and a well-calibrated slicer will yield uniform, professional-looking slices every time․
Slicing with the Grain vs․ Against the Grain
Understanding grain direction is crucial for tender results․ Slicing with the grain results in longer, easier-to-chew slices, ideal for tougher cuts like flank steak․ This follows the muscle fibers, minimizing resistance․
Conversely, slicing against the grain creates shorter fibers, requiring more chewing but yielding a more tender bite, perfect for roasts․ Observe the meat closely to identify the grain’s direction before beginning․
For deli-style meats like roast beef or turkey, slicing against the grain is generally preferred․ Experiment to discover what best suits your preference and the specific meat you’re preparing․
Slicing Different Types of Meat (Roast Beef, Turkey, Ham)
Roast beef benefits from slicing against the grain for maximum tenderness, aiming for thin, even slices․ Turkey, especially breast meat, also excels when sliced against the grain, yielding moist, flavorful portions․ A slightly angled blade helps achieve consistent thickness․
Ham, being a more delicate meat, often slices best with the grain, preserving its texture․ Adjust your slicer’s thickness dial accordingly – thinner for deli-style, thicker for sandwiches․ Remember to chill all meats thoroughly before slicing for optimal results and safety․

Maintaining Your Meat Slicer
Regular cleaning, blade sharpening, and proper lubrication are crucial for maintaining performance and ensuring food safety with your meat slicer․
Cleaning Procedures
Thorough cleaning after each use is paramount․ Disconnect the slicer from power before beginning․ Remove all detachable parts – the blade, carriage, and food tray – and wash them with warm, soapy water․ Avoid abrasive cleaners that could damage the stainless steel․
Pay close attention to crevices where meat particles can accumulate․ For the slicer body, wipe down with a damp cloth and mild detergent․ Never immerse the motor housing in water! Ensure all parts are completely dry before reassembling․ Proper sanitation prevents bacterial growth and maintains optimal slicer function, extending its lifespan and ensuring safe food preparation․
Sharpening the Blade
Maintaining a sharp blade is crucial for clean, effortless slicing․ A dull blade requires more force, increasing the risk of accidents․ Regularly inspect the blade’s edge for signs of dullness – difficulty cutting through meat or tearing instead of slicing․
Professional sharpening is recommended for optimal results, ensuring the correct angle is maintained․ Alternatively, specialized blade sharpening tools designed for meat slicers are available․ Always follow the manufacturer’s instructions carefully․ A sharp blade enhances safety, efficiency, and the overall quality of your sliced meats․
Lubrication
Proper lubrication ensures smooth operation and extends the lifespan of your meat slicer․ After each cleaning, apply a food-grade lubricant to all moving parts, including the blade track, gears, and any sliding mechanisms; This reduces friction, preventing wear and tear and maintaining optimal performance․
Refer to your slicer’s manual for specific lubrication recommendations, as different models may require different types of lubricant․ Avoid using excessive amounts, as this can attract debris․ Regular lubrication contributes to consistent slicing and minimizes the risk of motor strain․
Safety Precautions
Always handle blades with extreme care, unplug electric slicers during cleaning, and store the slicer securely to prevent accidental contact or injury․
Proper Handling of Sharp Blades
Meat slicer blades are incredibly sharp, demanding respect and caution․ Always use the provided blade guard when not actively slicing, and never attempt to catch a falling blade․ When cleaning, avoid direct hand contact; utilize brushes and appropriate cleaning tools․
Disassembling the blade should only be done by experienced individuals following the manufacturer’s instructions․ Never leave a slicer unattended with the blade exposed․ Proper technique involves a firm, controlled grip and slow, deliberate movements to prevent slips․ Remember, a moment of carelessness can lead to serious injury, so prioritize safety above all else․
Electrical Safety (for Electric Slicers)
Electric meat slicers present electrical hazards requiring strict adherence to safety protocols․ Always ensure the slicer is unplugged before cleaning or performing any maintenance․ Never operate the slicer with a damaged cord or plug, and avoid using extension cords if possible․
Keep the slicer away from water sources to prevent electric shock․ Do not attempt to repair the slicer yourself; contact a qualified technician for any repairs․ Regularly inspect the cord for wear and tear․ Grounding is crucial for safety; ensure the outlet is properly grounded․ Prioritize a dry environment during operation․
Storage Safety
Proper storage of your meat slicer is vital for safety and longevity․ Always unplug the slicer and ensure it’s completely dry before storing․ Retract the cord fully and store it within the designated compartment, preventing tripping hazards․
Store the slicer in a cool, dry place, away from children and pets․ If storing for an extended period, consider covering it to protect against dust and damage․ Never store the slicer with the blade exposed; utilize the blade guard․ Secure the slicer to prevent accidental falls or movement during storage․
Choosing the Right Meat Slicer for Your Needs
Consider usage frequency, meat volume, and budget when selecting a slicer․ Manual models suit infrequent use, while electric options excel with larger quantities․
Infrequent vs․ Frequent Use
Determining how often you’ll slice meat is crucial․ For occasional use and smaller volumes – perhaps a holiday roast or a few sandwiches a month – a manual meat slicer provides a cost-effective solution․ These require more physical effort but are simpler to clean and store․
However, if you regularly prepare deli-style meats, jerky, or cater events, an electric meat slicer is a worthwhile investment․ They offer consistent results with minimal effort, especially when dealing with larger cuts․ Automatic machines are recommended for frequent use and large volumes, saving time and ensuring uniform slices․
Volume of Meat Sliced
The amount of meat you typically slice directly impacts the ideal slicer choice․ If you’re only tackling smaller roasts or a pound or two of turkey for sandwiches, a compact, home-use electric slicer with a moderate blade size will suffice․ Larger families or those who frequently entertain will benefit from a slicer with a more substantial blade․
A larger blade allows for processing bigger cuts quickly and efficiently․ It also offers versatility, enabling you to slice cheese or other items alongside your meats․ Consider the capacity needed to avoid repetitive slicing and ensure a smooth workflow․
Budget Considerations
Meat slicer prices vary significantly, ranging from affordable manual models to high-end commercial machines․ For infrequent use and smaller volumes, a manual slicer represents a cost-effective entry point, often under $100․ However, if you anticipate frequent slicing, investing in an electric model is worthwhile․
Mid-range electric slicers, offering a balance of performance and features, typically fall in the $150-$250 range․ Premium models with larger blades and advanced features can exceed $300․ Carefully assess your needs and usage frequency to determine a budget that aligns with your requirements and delivers long-term value․

Recommended Meat Slicer Brands (Based on Current Market)
Several brands consistently receive positive reviews for reliability and performance, including options catering to diverse budgets and slicing needs for home cooks․
Brand A (Example)
Let’s consider “SliceMaster,” a hypothetical brand known for its mid-range electric meat slicers․ SliceMaster models typically feature a robust 200W motor, ideal for consistent home use without excessive bulk․ They prioritize user-friendliness with an intuitive thickness adjustment dial, allowing for precise cuts from delicate deli slices to substantial jerky portions․
Blade construction focuses on durable stainless steel, ensuring longevity and hygiene․ SliceMaster slicers often include safety features like a blade guard and locking carriage․ While not the cheapest option, they strike a balance between affordability, performance, and ease of maintenance, making them a popular choice for frequent users․
Brand B (Example)
Introducing “Chef’s Precision,” a brand specializing in smooth-blade meat slicers geared towards beginners and those prioritizing low maintenance․ Their models often feature a slightly lower wattage motor (around 150W), focusing on efficiency for smaller slicing tasks․ Chef’s Precision emphasizes simplicity, with easy-to-clean designs and straightforward operation․
These slicers are particularly well-suited for slicing cooked meats, cheeses, and vegetables․ While lacking the power for extremely large roasts, they excel at everyday deli-style slicing․ They represent a budget-friendly option without sacrificing essential functionality and safety features․
Brand C (Example)
“SliceMaster Pro” caters to users needing versatility, offering models with both smooth and serrated blade options․ Their range includes slicers with robust 250W motors, capable of handling larger volumes and tougher cuts of meat․ SliceMaster Pro prioritizes durability, utilizing high-grade stainless steel in blade construction and offering extended warranties․
These slicers often feature advanced safety mechanisms and precise thickness adjustment dials․ They are a good choice for those who frequently slice a variety of foods, including jerky, roasts, and cheeses, demanding consistent, professional-quality results․

Troubleshooting Common Issues
Addressing problems like dull cuts, motor failures, or blade wobble ensures optimal performance and extends the lifespan of your valuable meat slicing investment․
Slicer Not Cutting Cleanly
If your meat slicer isn’t delivering clean cuts, several factors could be at play․ First, ensure the blade is adequately sharp; a dull blade will tear rather than slice․ Secondly, confirm the meat is sufficiently chilled or partially frozen, as this firmness aids in achieving those smooth, even slices․
Also, examine the blade itself for any nicks or damage․ Even minor imperfections can disrupt the cutting process․ Finally, verify you’re applying consistent, even pressure during slicing – jerky movements can lead to uneven results․ Regular cleaning and proper blade maintenance are crucial for consistently clean cuts․
Slicer Motor Issues
Experiencing problems with your electric meat slicer’s motor? A common issue is overheating, especially during prolonged use․ Allow the motor to cool down completely before attempting to restart it․ Check the power cord and outlet to ensure a secure connection․ If the motor hums but doesn’t turn, there might be an internal obstruction․
Avoid forcing the motor; this could cause further damage․ For more serious issues, like a complete lack of power or unusual noises, professional repair or replacement may be necessary․ Always unplug the slicer before inspecting or attempting any repairs․
Blade Wobbling
A wobbling blade is a significant safety concern and impacts slicing precision․ First, ensure the blade is securely fastened according to the manufacturer’s instructions․ Check the blade mounting hardware – screws or bolts – for looseness and tighten them appropriately․ If the wobble persists, the blade itself might be damaged or bent․
Do not attempt to use a severely wobbling blade; it poses a risk of injury and uneven slices․ Consider professional sharpening or replacement․ Inspect the slicer’s base and internal components for any signs of damage contributing to the instability․