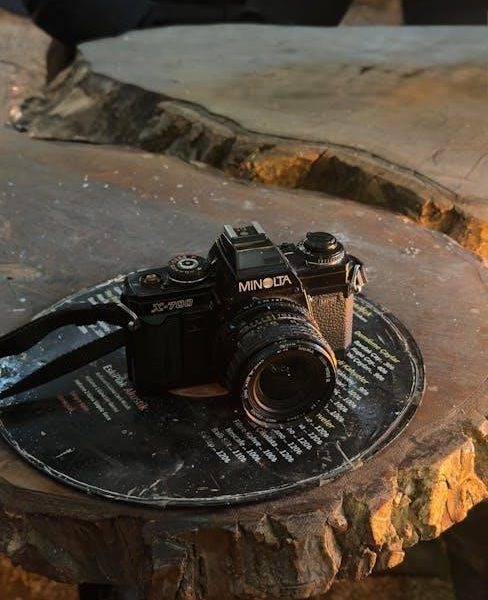
Minolta X-700 Camera Manual: A Comprehensive Guide
This guide details the Minolta X-700, a popular 35mm SLR, referencing a German manual published in 2020, offering insights into its operation and features.
The Minolta X-700, released in 1983, quickly became a favorite among photography enthusiasts due to its blend of advanced features and user-friendly operation. This manual serves as a comprehensive resource for both novice and experienced photographers seeking to master this classic 35mm SLR camera.
Drawing upon resources like the 2020 German-language manual, we aim to provide a detailed understanding of the X-700’s capabilities. It’s a camera celebrated for its electronic programmability, offering a range of shooting modes – Program, Aperture-Priority, Shutter-Priority, and Manual – providing creative control. This guide will navigate you through each aspect, ensuring you unlock the full potential of your Minolta X-700.
Historical Context and Significance
Launched in 1983, the Minolta X-700 arrived during a pivotal shift in camera technology – the rise of electronic automation; It represented Minolta’s commitment to innovation, offering features previously found only in more expensive models. The camera’s popularity stemmed from its accessibility; it brought advanced functionality to a wider audience.
Referencing documentation like the 2020 German manual, we see its enduring appeal. The X-700 wasn’t just a camera; it was a gateway for many into the world of serious photography. Its robust build quality and reliable performance cemented its place as a significant camera in photographic history, influencing subsequent SLR designs.
Key Features and Specifications
The Minolta X-700 is a 35mm SLR boasting a horizontally-traveling metal focal plane shutter with speeds from 2 to 1/2000th of a second, plus Bulb. It features a fully electronic control system, offering Program, Aperture-Priority, Shutter-Priority, and Manual exposure modes. The camera accepts standard 135 film, as detailed in available manuals like the German version from 2020.
Its key specs include a Minolta MD mount, supporting a wide range of lenses. The built-in light meter operates in both spot and averaging modes, enhancing versatility. The X-700’s compact size and user-friendly design contributed to its widespread adoption.
Understanding the Camera Body
The Minolta X-700’s body is primarily constructed from metal, providing a robust and durable feel. Its design prioritizes accessibility for both novice and experienced photographers. The top and back panels house essential controls, allowing for quick adjustments to settings. Referencing manuals, including the German edition from 2020, reveals a logical layout designed for intuitive operation.
The camera’s base features the film compartment and battery access. The viewfinder offers a clear view of the scene, displaying crucial exposure information. Understanding the physical layout is fundamental to mastering the X-700’s capabilities.
Top Panel Controls
The Minolta X-700’s top panel hosts the main program dial, selecting between Program, Aperture-Priority, Shutter-Priority, and Manual exposure modes. A film advance lever swiftly moves film, also cocking the shutter. The shutter speed dial allows precise control in Manual and Shutter-Priority modes.
The ISO setting dial is conveniently located for quick adjustments to film sensitivity. The electronic self-timer button initiates a delayed shutter release. These controls, detailed in available manuals like the 2020 German publication, provide direct access to core camera functions, enabling efficient shooting.
Back Panel Controls
The Minolta X-700’s back panel features the film rewind crank and release button, essential for film handling. A prominent frame counter displays the number of exposures taken. The film door release latch provides access for loading and unloading film.
Crucially, the back panel also houses the battery compartment, accepting standard batteries to power the camera’s electronic functions. Detailed in manuals, including the German version from 2020, these controls are vital for operation. Understanding their placement and function ensures smooth film loading, rewinding, and camera power management.
Loading Film into the Minolta X-700
Loading film into the Minolta X-700 requires careful attention. First, locate the film door release latch on the camera’s back panel. Open the door and insert the 135 film cartridge into the film chamber. Ensure the film leader extends across the camera body to the take-up spool.
Advance the film using the film advance lever, checking that the rewind knob rotates, confirming film engagement. As detailed in available manuals, including the German publication from 2020, proper loading prevents damage and ensures correct exposure counting. Close the back door securely before shooting.
Film Type Compatibility (135 Film)
The Minolta X-700 is specifically designed for use with standard 135 film, also known as 35mm film. This encompasses a wide variety of film types, including color negative, color slide (transparency), and black and white films. The camera’s mechanics are optimized for these film formats.
Referencing available documentation, like the 2020 German manual, confirms compatibility with ISO 25 to 3200 films. While experimentation with different film stocks is encouraged, adhering to this range ensures optimal performance and reliable results with the X-700’s metering system.
Film Loading Procedure – Step-by-Step
Begin by opening the camera back using the film release lever. Insert the 135 film cartridge into the film chamber. Ensure the film leader extends across the camera body to the take-up spool. Gently advance the film using the film advance lever, verifying the sprocket holes engage correctly.
Continue advancing the film and observing the rewind knob turning, indicating film is being taken up. Close the camera back securely. Reset the film counter dial to ‘S’ and advance the film twice more before beginning shooting. Referencing manuals, like the German version from 2020, confirms these steps.
Exposure Modes Explained
The Minolta X-700 offers versatile exposure control. Program Mode (P) allows the camera to automatically select both aperture and shutter speed for optimal exposure. Aperture-Priority Mode (A) lets you choose the aperture, while the camera sets the shutter speed. Conversely, Shutter-Priority Mode (S) enables you to set the shutter speed, with the camera determining the aperture.
For complete creative control, utilize Manual Mode (M), independently setting both aperture and shutter speed. Understanding these modes, detailed in available manuals including the 2020 German publication, is crucial for achieving desired photographic results.
Program Mode (P)
In Program Mode (P) on the Minolta X-700, the camera intelligently handles both aperture and shutter speed settings, aiming for a well-exposed photograph in various lighting conditions. This mode simplifies operation, making it ideal for beginners or situations demanding quick responses. The camera’s internal metering system analyzes the scene and selects what it deems the optimal combination.
Referencing manuals, including the German version from 2020, reveals that Program Mode prioritizes ease of use, though experienced photographers might prefer more manual control for specific creative effects.
Aperture-Priority Mode (A)
Aperture-Priority Mode (A) on the Minolta X-700 allows photographers to control the lens aperture, influencing depth of field, while the camera automatically sets the appropriate shutter speed for correct exposure. This is excellent for controlling background blur (bokeh) or ensuring sharpness throughout the image.
The German manual published in 2020 highlights that this mode provides a balance between creative control and automation. Users select the ‘f-stop’ and the camera calculates the exposure time, displayed in the viewfinder. It’s a favored mode for portraiture and landscape photography.
Shutter-Priority Mode (S)
Shutter-Priority Mode (S) on the Minolta X-700 empowers photographers to dictate the shutter speed, freezing motion or creating intentional blur, while the camera automatically adjusts the aperture for proper exposure. This mode is ideal for sports, action, or capturing flowing water effects.
Referencing the 2020 German manual, this mode allows precise control over time, crucial for dynamic scenes. The camera’s light meter calculates the necessary aperture, displayed in the viewfinder. It’s a powerful tool for achieving specific creative effects, balancing motion and light effectively.
Manual Mode (M)
Manual Mode (M) on the Minolta X-700 grants the photographer complete control over both shutter speed and aperture. This mode bypasses the camera’s automatic systems, demanding a thorough understanding of the exposure triangle. It’s favored for challenging lighting situations or when precise creative control is paramount.
As detailed in the 2020 German manual, utilizing Manual Mode requires reliance on the built-in light meter for accurate exposure readings. Photographers must independently adjust settings, offering ultimate artistic freedom. Mastering this mode unlocks the full potential of the X-700.
Focusing System and Viewfinder Information
The Minolta X-700 employs a single-lens reflex (SLR) focusing system, allowing photographers to view precisely what the lens sees. The viewfinder provides crucial information for accurate focusing and exposure. Different Focusing Screen Types can be installed, altering the view for specific needs – split-image or microprism collars aid in sharp focus.
Referencing available documentation, the Viewfinder Readout Explanation details how the camera displays shutter speed, aperture, and exposure indicators. Understanding these readouts is vital for achieving correctly exposed and sharply focused images with the X-700.

Focusing Screen Types
The Minolta X-700 offers interchangeable focusing screens, allowing users to customize the viewfinder experience. Common options include the standard screen, a split-image screen for precise focusing, and a microprism collar screen which enhances clarity, particularly in low light. These screens impact how easily you achieve critical focus.
Selecting the appropriate screen depends on your shooting style and preferences. The split-image screen presents a divided view, aligning for sharpness, while the microprism collar offers a textured appearance that blurs when out of focus. Understanding these differences is key to maximizing the X-700’s focusing capabilities.
Viewfinder Readout Explanation
The Minolta X-700’s viewfinder provides crucial shooting information. LED indicators display exposure settings – underexposure (-), correct exposure (0), and overexposure (+). A separate LED confirms shutter speed priority mode (S) or aperture priority mode (A). Additionally, a center-weighted metering spot illuminates during metering, indicating the area being assessed for exposure.
A battery check LED warns of low battery levels, and focusing aids, like split-image or microprism collars, assist in achieving sharp images. Understanding these viewfinder readouts is essential for accurate exposure and confident shooting with the X-700.
Using the Built-in Light Meter
The Minolta X-700 features a reliable through-the-lens (TTL) metering system. Activate the meter by half-pressing the shutter release. The viewfinder LEDs then indicate correct, under, or overexposure. Remember to select your desired metering mode – either spot or average – based on the scene.
Exposure compensation is crucial for challenging lighting. Use the dial to adjust readings when the meter is fooled by bright or dark subjects. Regularly check the battery, as a weak battery impacts metering accuracy. Practice using the meter in various conditions to master its capabilities.
Metering Modes (Spot, Average)
The Minolta X-700 offers two primary metering modes: Spot and Average. Spot metering measures light from a very small area – approximately 5% of the viewfinder – ideal for precise readings on specific subjects. This is useful in high-contrast scenes.
Average metering, conversely, evaluates light across the entire frame, providing a more generalized exposure. It’s suitable for evenly lit scenes. Switching between modes is typically done via a selector on the camera body. Understanding when to use each mode is key to achieving properly exposed photographs.
Exposure Compensation
The Minolta X-700 features exposure compensation to override the camera’s automatic metering system. This is crucial when shooting scenes with unusual lighting, like strong backlighting or predominantly white/black subjects. Compensation is adjusted using a dial, typically marked with + and ⎼ values.
These values represent stops of light; +1 increases exposure, while -1 decreases it. Using exposure compensation allows photographers to fine-tune the exposure for accurate results, preventing underexposed or overexposed images when the camera’s meter is fooled by the scene’s reflectivity.
Troubleshooting Common Issues
The Minolta X-700, while reliable, can occasionally present issues. Common problems include film advance difficulties, often stemming from a weak battery or mechanical obstruction within the winding mechanism; Shutter release issues might arise from a discharged battery, incorrect settings, or a jammed shutter curtain.
If the camera fails to respond, always check the battery first. Ensure the film is loaded correctly and isn’t tangled. Refer to the manual for specific error codes or unusual behavior. Regular maintenance, like cleaning and proper storage, can prevent many of these issues.
Film Advance Problems
Experiencing issues with film advance on your Minolta X-700? Several factors could be at play. A weak or depleted battery is a frequent culprit, hindering the motor’s ability to wind the film. Ensure a fresh battery is installed and properly connected. Check for obstructions within the film chamber – improperly loaded film can cause jams.
Also, verify the film leader is correctly engaged with the take-up spool. If the problem persists, a mechanical fault within the winding mechanism might require professional servicing. Avoid forcing the advance lever, as this could cause further damage.
Shutter Release Issues
If your Minolta X-700’s shutter isn’t firing, begin by confirming the battery has sufficient charge, as the electronic shutter relies on power. Check the camera isn’t in a mode preventing release, like self-timer or bulb mode. Ensure the lens is correctly mounted and the aperture is set appropriately.
A common issue is a dirty or corroded electrical contact between the camera body and lens. Clean these contacts gently. If the problem continues, the shutter mechanism itself may require professional attention. Never attempt to disassemble the shutter yourself.
Maintenance and Care
Regular maintenance ensures your Minolta X-700 remains in optimal working condition. Avoid exposing the camera to extreme temperatures, humidity, or direct sunlight for prolonged periods. Store it in a dry, dust-free environment when not in use. Gently blow away any dust or debris from the camera body and lens.
Avoid using harsh chemicals or abrasive cleaners. Periodically check the battery compartment for corrosion. Proper care extends the lifespan of this classic camera, preserving its functionality and value for years to come. Professional servicing is recommended every few years.
Cleaning the Lens
Maintaining a clean lens is crucial for sharp images with your Minolta X-700. Begin by using a blower to remove loose dust and particles. For fingerprints or smudges, use a soft, lint-free microfiber cloth dampened very lightly with lens cleaning solution.
Apply gentle circular motions, working from the center outwards. Avoid excessive pressure. Never apply liquid directly onto the lens. Stubborn marks may require a professional cleaning. Regular, gentle cleaning prevents buildup and ensures optimal image quality. Protect the lens with a UV filter to minimize scratches.
Battery Replacement
The Minolta X-700 utilizes a standard 4LR44 or equivalent 1.5V silver oxide battery to power its electronic functions, including the light meter. To replace it, locate the battery compartment on the camera’s bottom. Use a small screwdriver to open the compartment cover.
Remove the old battery and insert the new one, observing the correct polarity (+ and -). Ensure the battery is securely seated. Close the compartment cover tightly; Low battery levels can cause inaccurate readings, so replace promptly. Always dispose of used batteries responsibly.