Poulan Pro PP19A42 Parts Manual: A Comprehensive Guide
Today, February 12th, 2026, at 2:45 PM, this manual welcomes you to expertly navigate your Poulan Pro PP19A42, unlocking its full potential through detailed guidance.
Welcome to the world of efficient lawn care with your Poulan Pro PP19A42! This riding lawn mower is engineered for performance and durability, designed to tackle various yard sizes and conditions with ease. This parts manual serves as your essential companion, providing a detailed roadmap to understanding, maintaining, and repairing your machine.
Whether you’re a seasoned DIY enthusiast or a first-time mower owner, this guide will empower you to confidently address any maintenance or repair needs. We’ll delve into the intricacies of each component, from the engine to the deck, ensuring you have the knowledge to keep your PP19A42 running smoothly for years to come. Remember, proper maintenance extends the life of your equipment and ensures optimal cutting performance. This manual, dated February 12th, 2026, is your key to unlocking the full potential of your Poulan Pro PP19A42.
Understanding the PP19A42 Model

The Poulan Pro PP19A42 is a 42-inch riding lawn mower, renowned for its robust construction and reliable performance. It typically features a Briggs & Stratton engine, providing ample power for various cutting tasks. Understanding its core components – the engine, deck, drive system, and electrical system – is crucial for effective maintenance and repair.
This model is designed for residential use, offering a comfortable operator experience and efficient cutting capabilities. The 42-inch deck allows for wider cutting paths, reducing mowing time. Familiarizing yourself with the specific parts and their functions, as detailed in this manual (current as of February 12th, 2026), will significantly simplify any troubleshooting or repair processes. Proper identification of parts is the first step towards successful maintenance, ensuring you order the correct replacements when needed.
Safety Precautions & Warnings
Prior to any maintenance or repair on your Poulan Pro PP19A42 (as of February 12th, 2026), always disconnect the spark plug wire to prevent accidental starting. Wear appropriate safety glasses and gloves to protect your eyes and hands. Never work under the mower while the engine is running or when it’s not securely supported.
Be extremely cautious when handling fuel; it is highly flammable. Ensure adequate ventilation when working with gasoline. Keep children and pets away from the work area. Before inspecting or cleaning the cutting blades, ensure the mower is turned off and the blade has completely stopped rotating. Regularly inspect all parts for wear and damage, replacing them promptly. Ignoring safety precautions can lead to serious injury. This manual serves as a guide, but common sense and careful operation are paramount.
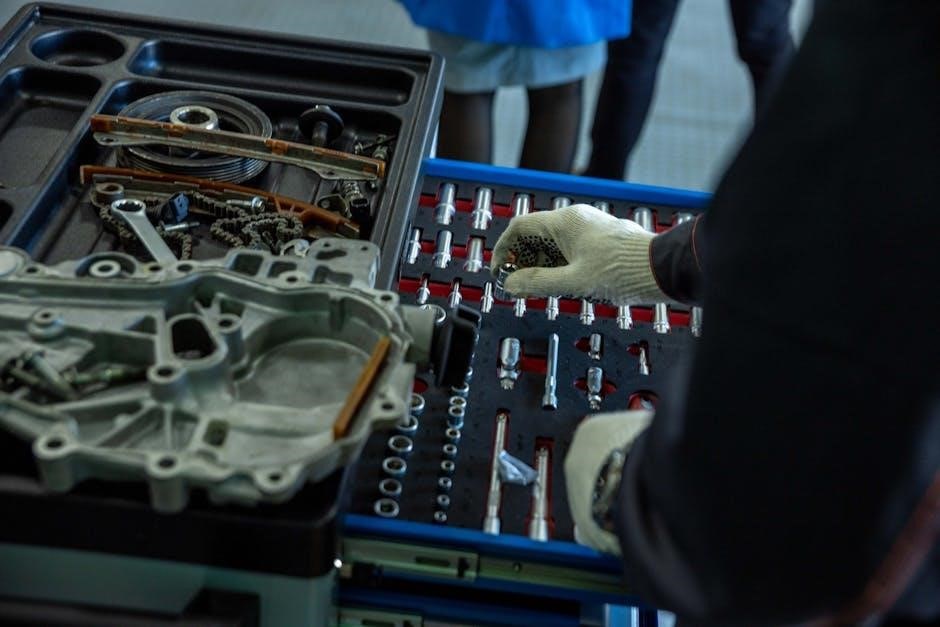
Engine Components & Parts
Delving into the heart of the PP19A42, we’ll explore vital engine parts, focusing on Briggs & Stratton models, for optimal performance and longevity.
Engine Model Identification (Briggs & Stratton)
Accurate engine identification is paramount for sourcing the correct replacement parts and ensuring proper maintenance of your Poulan Pro PP19A42. Briggs & Stratton engines are commonly found powering this model, but specific variations exist. Locate the engine’s model, type, and serial number – typically stamped on the engine block, often near the spark plug or under the muffler.
This information is crucial when ordering parts, as even seemingly similar engines can have unique components. Refer to the engine’s label or consult the original owner’s manual for precise location details. Online Briggs & Stratton parts finders utilize this data to pinpoint compatible replacements. Incorrect part numbers can lead to fitment issues and compromised performance.
Always double-check the engine code before finalizing any purchase. Understanding your engine’s specifics empowers you to perform effective repairs and maintain the longevity of your Poulan Pro PP19A42’s power source.
Carburetor Assembly & Repair
The carburetor is vital for mixing air and fuel in the correct ratio, ensuring optimal engine performance of your Poulan Pro PP19A42. Common issues include a clogged carburetor, resulting in hard starting or rough running. Disassembly requires careful attention to detail; photograph each step for reassembly guidance.
Begin by disconnecting the fuel line and noting the position of all linkages and springs. Use carburetor cleaner to thoroughly flush all passages, paying close attention to the jets. Inspect the float and needle valve for wear or damage, replacing if necessary. A carburetor rebuild kit often contains essential replacement parts.
Reassemble carefully, ensuring all components are correctly positioned. Improper reassembly can lead to fuel leaks or poor engine operation. Always test the carburetor after repair before reinstalling it on the engine.
Air Filter & Intake System
Maintaining a clean air filter is crucial for the longevity and performance of your Poulan Pro PP19A42 engine. A dirty air filter restricts airflow, leading to reduced power and increased fuel consumption. Regularly inspect the air filter for debris and replace it as needed – typically after every 25 hours of operation, or more frequently in dusty conditions.
The intake system comprises the air filter housing, intake tube, and carburetor connection. Ensure all connections are secure and free from cracks or leaks. Inspect the intake tube for obstructions that could impede airflow. Cleaning the air filter housing with soap and water before installing a new filter is recommended.
Proper airflow ensures the correct air-fuel mixture, maximizing engine efficiency and minimizing emissions. A well-maintained intake system contributes significantly to overall mower performance.
Spark Plug & Ignition System
The ignition system of your Poulan Pro PP19A42 is vital for starting and running the engine. A key component is the spark plug, responsible for igniting the air-fuel mixture. Regularly inspect the spark plug for fouling, wear, and proper gap setting – typically around 0.030 inches. Replace the spark plug annually or as needed for optimal performance.
Symptoms of a faulty spark plug include hard starting, misfiring, and reduced power. Ensure the spark plug wire is securely connected and free from damage. The ignition coil provides the high voltage needed for spark generation; testing its functionality may require specialized tools.
Maintaining a healthy ignition system ensures reliable engine operation and prevents potential damage. Always disconnect the spark plug wire before performing any maintenance on the engine.
Deck & Cutting System Parts
This section details the Poulan Pro PP19A42’s cutting deck, blades, and related components, ensuring efficient grass cutting and long-lasting performance for your lawn.
Blade Installation & Sharpening
Proper blade maintenance is crucial for a clean cut and the longevity of your Poulan Pro PP19A42. Always disconnect the spark plug wire before performing any blade work for safety. When installing new blades, ensure they are correctly oriented – the cutting edges must face the direction of rotation.
Tighten blade bolts to the manufacturer’s specified torque to prevent loosening during operation. Dull blades tear grass, causing an unhealthy lawn and stressing the engine. Sharpening can be done with a file, grinder, or by a professional service.
Maintain blade balance after sharpening; an unbalanced blade causes excessive vibration and potential damage. Regularly inspect blades for bends, cracks, or excessive wear, replacing them as needed. Remember to wear appropriate safety gear, including gloves and eye protection, during all blade-related procedures.
Deck Belt Replacement
Replacing the deck belt on your Poulan Pro PP19A42 requires careful attention to routing and tension. Begin by disconnecting the spark plug wire for safety. Access the belt by removing the deck cover. Note the original belt path before removal – diagrams are often helpful for reinstallation.
Release tension on the belt tensioner to remove the old belt. Install the new belt, carefully following the original routing. Ensure the belt is seated correctly in all pulleys. Re-engage the tensioner, verifying proper belt tension.
Inspect pulleys for wear or damage during replacement; worn pulleys can quickly damage new belts. A properly tensioned belt is essential for efficient cutting and prevents slippage. Reinstall the deck cover and reconnect the spark plug wire after confirming correct operation.
Spindle Assembly & Bearings
The spindle assembly on the Poulan Pro PP19A42 is crucial for blade rotation and cutting performance. Regular inspection of spindle bearings is vital, as wear can cause excessive vibration and noise. To access the spindle, the blade must be removed, and the deck cover detached for clear access.
Bearing failure often manifests as a grinding sound during operation. Replacement typically involves removing the spindle assembly, pressing out the old bearings, and installing new ones. Specialized tools, like a bearing press, are recommended for this task.
Ensure proper lubrication of the bearings during reassembly. Verify the spindle spins freely after reinstallation. A damaged spindle assembly can lead to blade instability and potential safety hazards, so prompt repair is essential for continued safe operation.

Drive System & Components
This section details the Poulan Pro PP19A42’s drive system, covering belts, wheels, and the transaxle, ensuring smooth and efficient operation for the user.
Drive Belt Diagram & Replacement
Understanding the drive belt system is crucial for maintaining your Poulan Pro PP19A42’s self-propelled function. A detailed diagram illustrates the belt’s routing around the transaxle, pulleys, and engine components, providing a visual guide for proper installation. Replacement is necessary when the belt becomes worn, cracked, or stretched, resulting in slippage and reduced drive power.
Before beginning, disconnect the spark plug wire for safety. Carefully note the belt’s original path before removal. Loosen the belt tensioner to release the old belt, then install the new one, ensuring it’s seated correctly in all pulley grooves. Re-tension the belt and verify proper alignment. A correctly installed drive belt guarantees optimal traction and efficient mowing performance, extending the lifespan of your PP19A42.
Wheel & Tire Information
Maintaining proper wheel and tire condition is vital for the Poulan Pro PP19A42’s maneuverability and stability. This section details tire specifications, including size, ply rating, and recommended inflation pressure – typically found on the tire sidewall. Regularly check tire pressure using a reliable gauge, ensuring it aligns with the manufacturer’s specifications for optimal performance and a comfortable mowing experience.
Inspect tires for damage such as cuts, bulges, or excessive wear. Damaged tires should be replaced immediately to prevent potential hazards. When replacing wheels or tires, ensure compatibility with the PP19A42’s axle and bolt pattern. Proper wheel alignment contributes to even wear and tear, maximizing tire lifespan and ensuring smooth operation across various terrains.
Transaxle/Gearbox Details
The transaxle/gearbox is the heart of the PP19A42’s drive system, responsible for transferring engine power to the wheels. This section provides detailed information regarding its components, including gears, shafts, and housing. Understanding its operation is crucial for diagnosing and repairing drive-related issues. Regular inspection of the gearbox for leaks, unusual noises, or difficulty shifting is recommended.
Lubrication is paramount for gearbox longevity. Use only the manufacturer-specified transaxle fluid, checking and replenishing levels as needed. Disassembly should only be performed by qualified technicians, as it involves intricate parts and precise adjustments. Incorrect reassembly can lead to performance issues or complete failure. Always refer to exploded diagrams for proper component placement during servicing.
Electrical System & Parts
This section details the PP19A42’s electrical components, including wiring harnesses, the battery, and charging system, ensuring safe and effective troubleshooting procedures.
Wiring Diagram Overview
Understanding the Poulan Pro PP19A42’s electrical system begins with a thorough review of its wiring diagram. This diagram serves as a roadmap, illustrating the connections between all electrical components – from the battery and ignition coil to the safety switches and lighting. Carefully tracing each wire’s path is crucial for diagnosing electrical faults accurately.
The diagram typically showcases color-coded wires, each representing a specific circuit. Pay close attention to these color codes when identifying and testing connections. Common issues often stem from loose connections, corroded terminals, or damaged wiring insulation. Before attempting any repairs, always disconnect the spark plug wire to prevent accidental starting.
Referencing the diagram will help you pinpoint the source of problems like a mower that won’t start, intermittent operation, or malfunctioning lights. A clear understanding of the wiring layout is essential for safe and effective troubleshooting, minimizing downtime and ensuring your PP19A42 operates reliably.
Battery & Charging System
The Poulan Pro PP19A42 relies on a robust battery and charging system for reliable starting and operation. Typically, these mowers utilize a 12-volt battery to power the starter and ignition. Regular maintenance is key to ensuring optimal performance. Inspect the battery terminals for corrosion and clean them thoroughly with a wire brush if necessary.
The charging system, usually comprised of an alternator or stator, recharges the battery while the engine is running. A faulty charging system will lead to a discharged battery and starting difficulties. Testing the battery’s voltage with a multimeter is a simple way to assess its condition.
Proper battery care, including keeping it fully charged during storage, significantly extends its lifespan. Always disconnect the battery during prolonged periods of inactivity to prevent self-discharge and potential damage. Understanding these components ensures consistent power for your PP19A42.